Saturday, April 26, 2014

Eggless Indian Tapioca Pudding


The beauty of this tapioca pudding is that it is egg-less and it does not need baking. It is cooked right on stove top with just three ingredients: tapioca, milk and sugar. Just like that it tastes good but often it is further embellished with cashews, saffron and cardamom.

What you will need:

Tapioca, also called sago
Milk
Sugar
Cardamom pods (optional)
Saffron (optional)
Cashews (optional)
(I am not giving precise measurements for the three main ingredients. Two tablespoons of tapioca for a cup of milk will give you a fairly thick pudding. If you want yours thin, use less tapioca or more milk. Same goes for sugar.)

1. Soak the tapioca in cold water for about 30 minutes. Soaking helps it cook faster.


2. Slowly heat the milk in a thick vessel on the stove. When the milk is quite hot, add the tapioca (without the water) into the milk. 
3. Cook the tapioca in the milk in low heat. Stir the milk and tapioca frequently to prevent it from sticking to the bottom of the container.
4. As the tapioca cooks, it will lose its whiteness and turn translucent. When it is completely translucent, add sugar and other condiments, such as saffron and cardamom.


5. Remove from heat.
6. If you want, you may add cashews either raw or roasted.


Serve hot or cold. Enjoy.


 Thanks for visiting.


Tuesday, April 22, 2014

Earth Day


It is Earth Day celebration at I am the Diva czt. This is my submission, done on Kraft paper which gives the impression of flowers on a stone path.

Thanks for visiting.

Dyeing with Henna


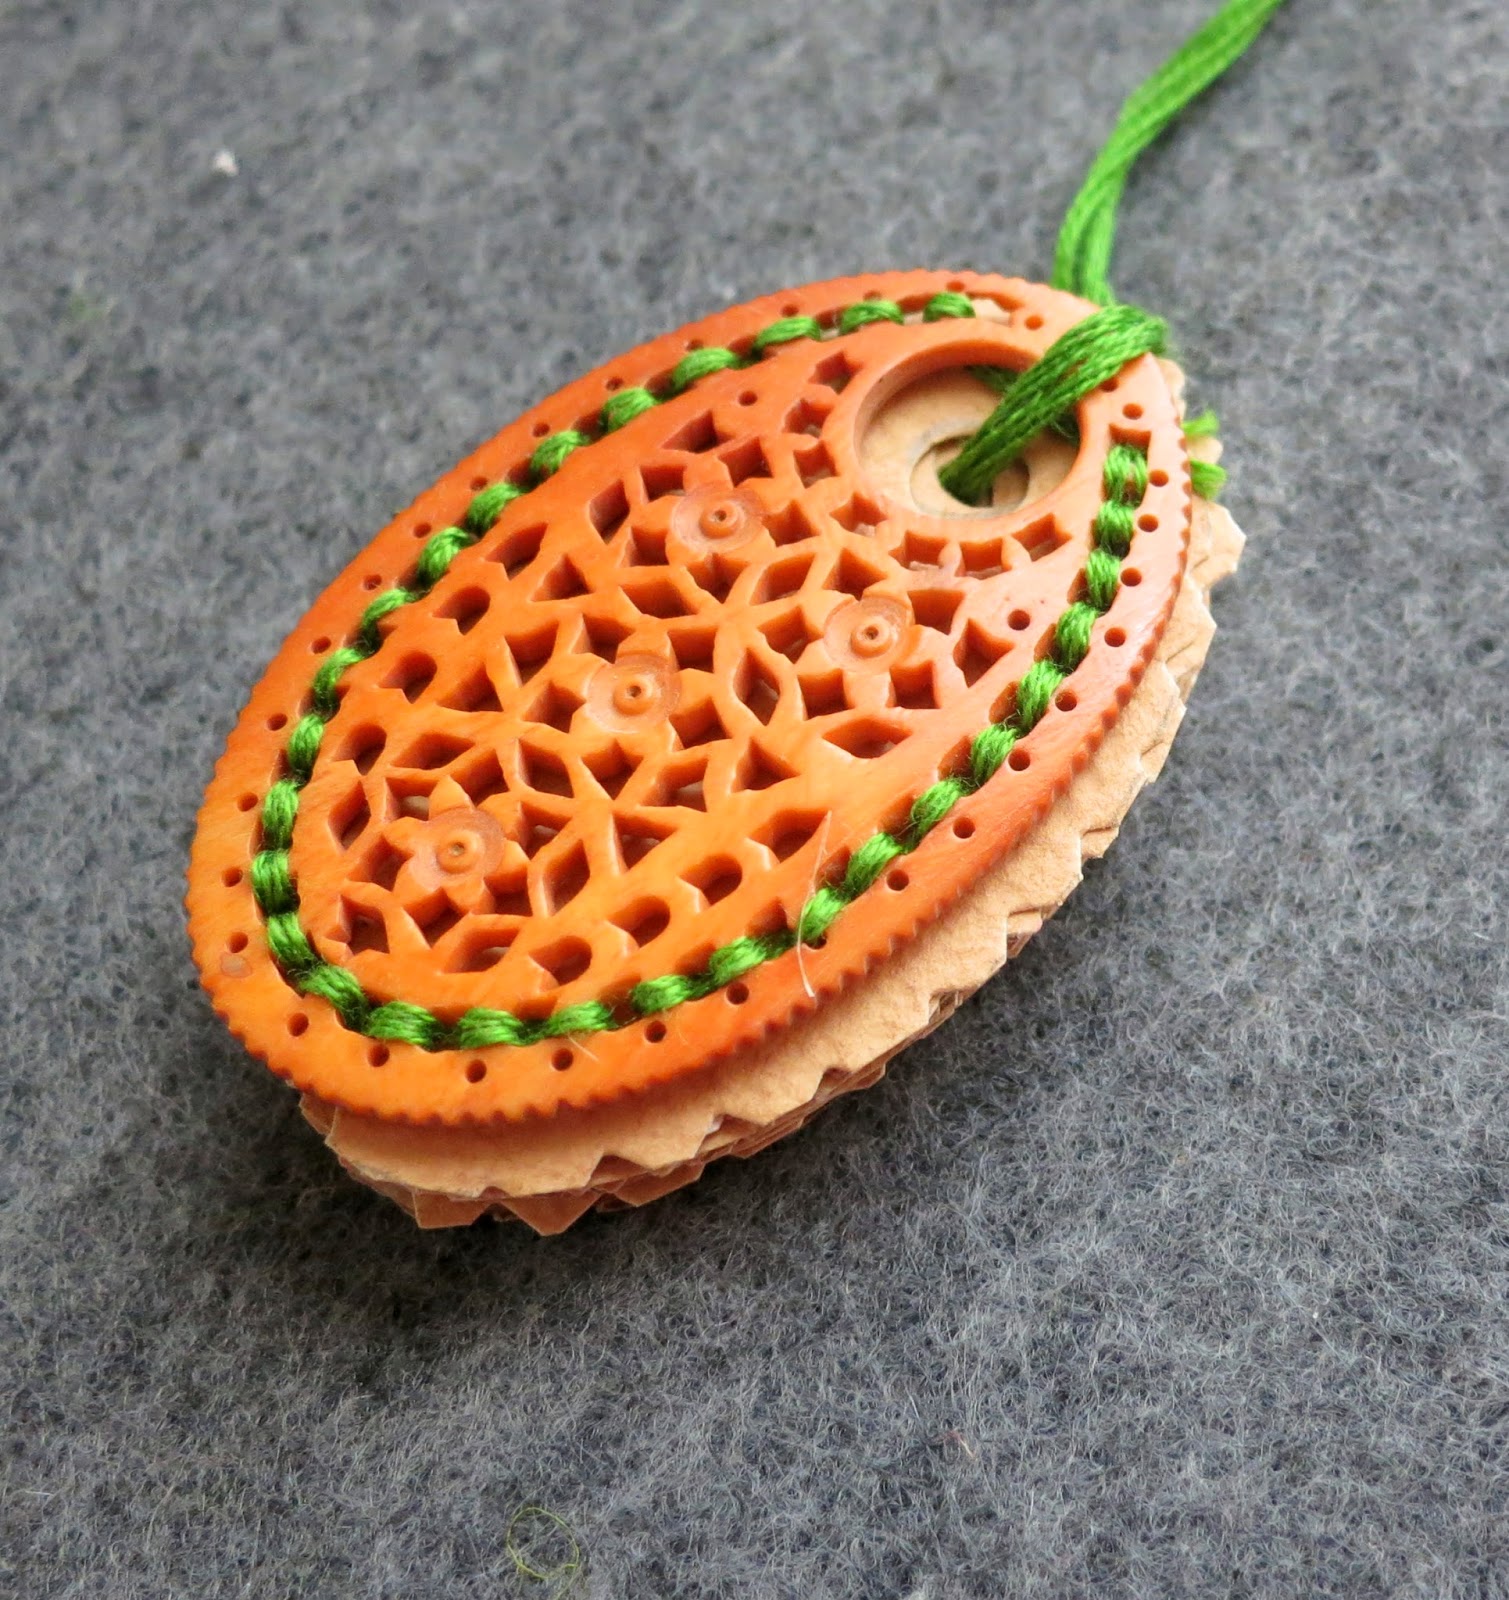
I love henna and I am always looking for opportunities to incorporate the rich, warm orange brown of the henna color into my work. I found a wonderful use for it in the carved white bone components that I have been accumulating for a while. These carved bone components make for fabulous jewelry designs but one of the disadvantages of using them is that they tend to yellow over a period of time due to exposure to air and contact with the skin. I had tried to polish them in various ways but could not bring back the original whiteness. This was when I decided to dye them with henna, and what I realized was that the new coloring expanded the jewelry designing possibilities. Henna's deep orange color allowed me to add more coordinating and contrasting colors in the necklaces and earrings which made everything glow.


The photo below provides the before and after views. As you can notice the coloring brings out the details of the carving much more sharply. I use simple but effective techniques to get the deep rich color of the henna on to the components. The instructions are below:


Materials:

Henna powder (you can buy it from any Indian store or online)
essential oil ((black pepper oil, frankincense oil or eucalyptus oil) or plain vinegar
Bone beads
Water

Blend henna and water to a cream like consistency.
Add a few drop of essential oil  or  plain vinegar.
Place the bead components into the henna mixture and cover them completely with the paste.
Cover and let it sit in a warm place for a few hours.
(I usually let it sit outside on a sunny spot.) 

Once you are satisfied with the dye color, take it out and wash it with cold water (no soap, please). Dry and buff it with a soft cloth. The buffing will bring out the shine.

The amount of oil and the length of time for marinating the beads will depend upon the depth of color you want. With a little oil and warmth, henna will dye to a rich hue. If you want something paler, reduce or eliminate either or both. Below is a lighter version of the dye.


Thanks for visiting.

Friday, April 4, 2014

Peanut Butter and Green Pepper: Is it a Dip or a Curry?


Curry Sandwich


Whenever we have an international luncheon at work, I always struggle to come up with a dish that will appeal amidst all that meaty splendor spread on the buffet table. It was when I noticed Scott, my son-in-law, eating it with relish, that it occurred to me that I should make it for this year's international luncheon. Sure enough, every one liked it, wanted the recipe and here it is.

This is a variation on a Goan curry that is made with homemade ground peanut and coconut paste. One day, feeling lazy, I decided to substitute  peanut butter. I have not looked back since then :)

Ingredients

medium sized green, red bell peppers (capsicum)-- 2 or 3
medium sized red onion-- one (optional)
fresh ginger to taste (optional)
Chunky peanut butter--1-2 tablespoon
Olive oil-- 1-2 tablespoon
salt to taste
red chili powder (optional)
turmeric-- 1/2 teaspoon (optional)


Instructions 


1. After removing the core and the seeds chop the pepper into small chunks. (Cut the onion and the ginger also into small pieces, if you are using them.)


2. Heat olive oil in a skillet; add the onions and the ginger. (Note: I have also added black mustard seeds. That is the way I cook but you do not have to.)

3. Cook till the onions turn translucent.


4. Add the chopped bell peppers, spices and the salt.


5. Cook till the peppers turn soft.


6. Add peanut butter.


7. Mix it thoroughly into the cooked vegetables with a spatula till it is all melted and gooey.


You can eat this with nacho chips, pita bread, naan or roti. Any which way, it is finger lickin' good!