Monday, December 30, 2013

Rubber Stamping


I was tempted into rubber stamp making after seeing hundreds of DIYs on Pinterest and Craftgawker. I bought a set of carving tools and a handful of craving blocks from a local Dick Blick store. Needless to say, my initial foray into stamp making was not encouraging. I put the whole project into a cold storage and decided to stay with commercial products.

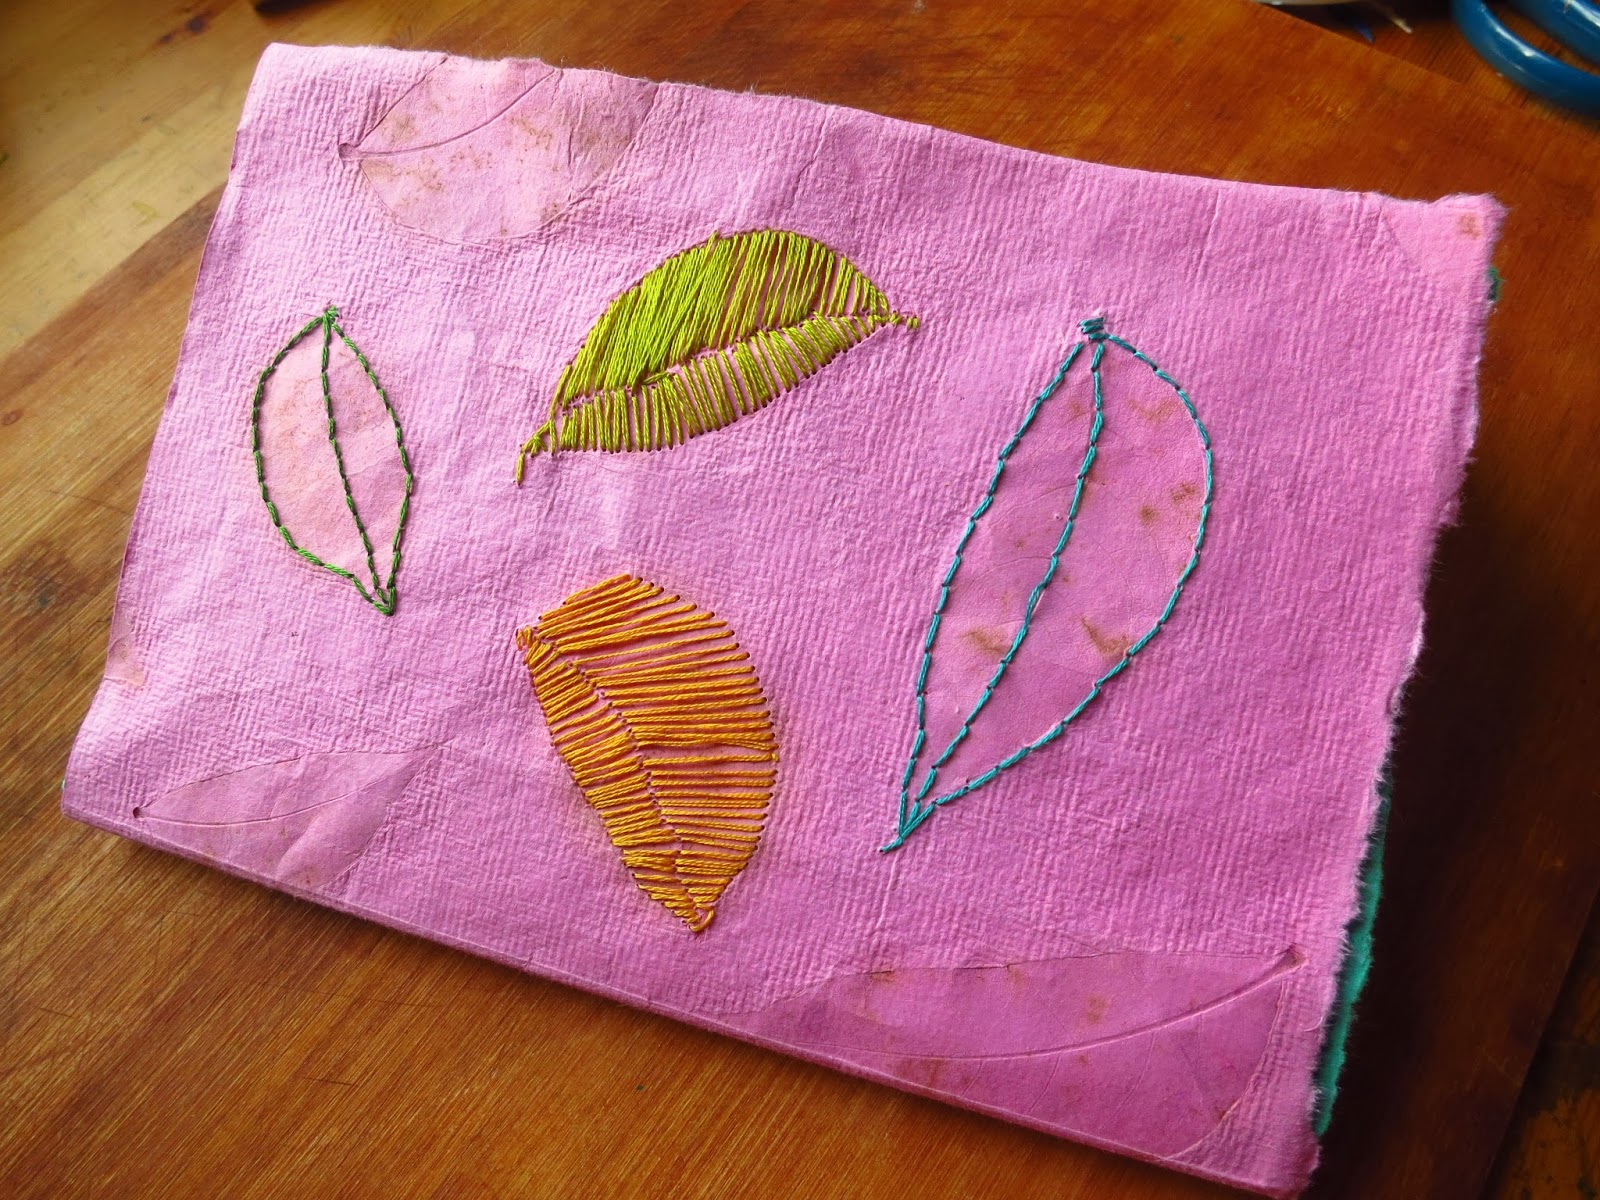
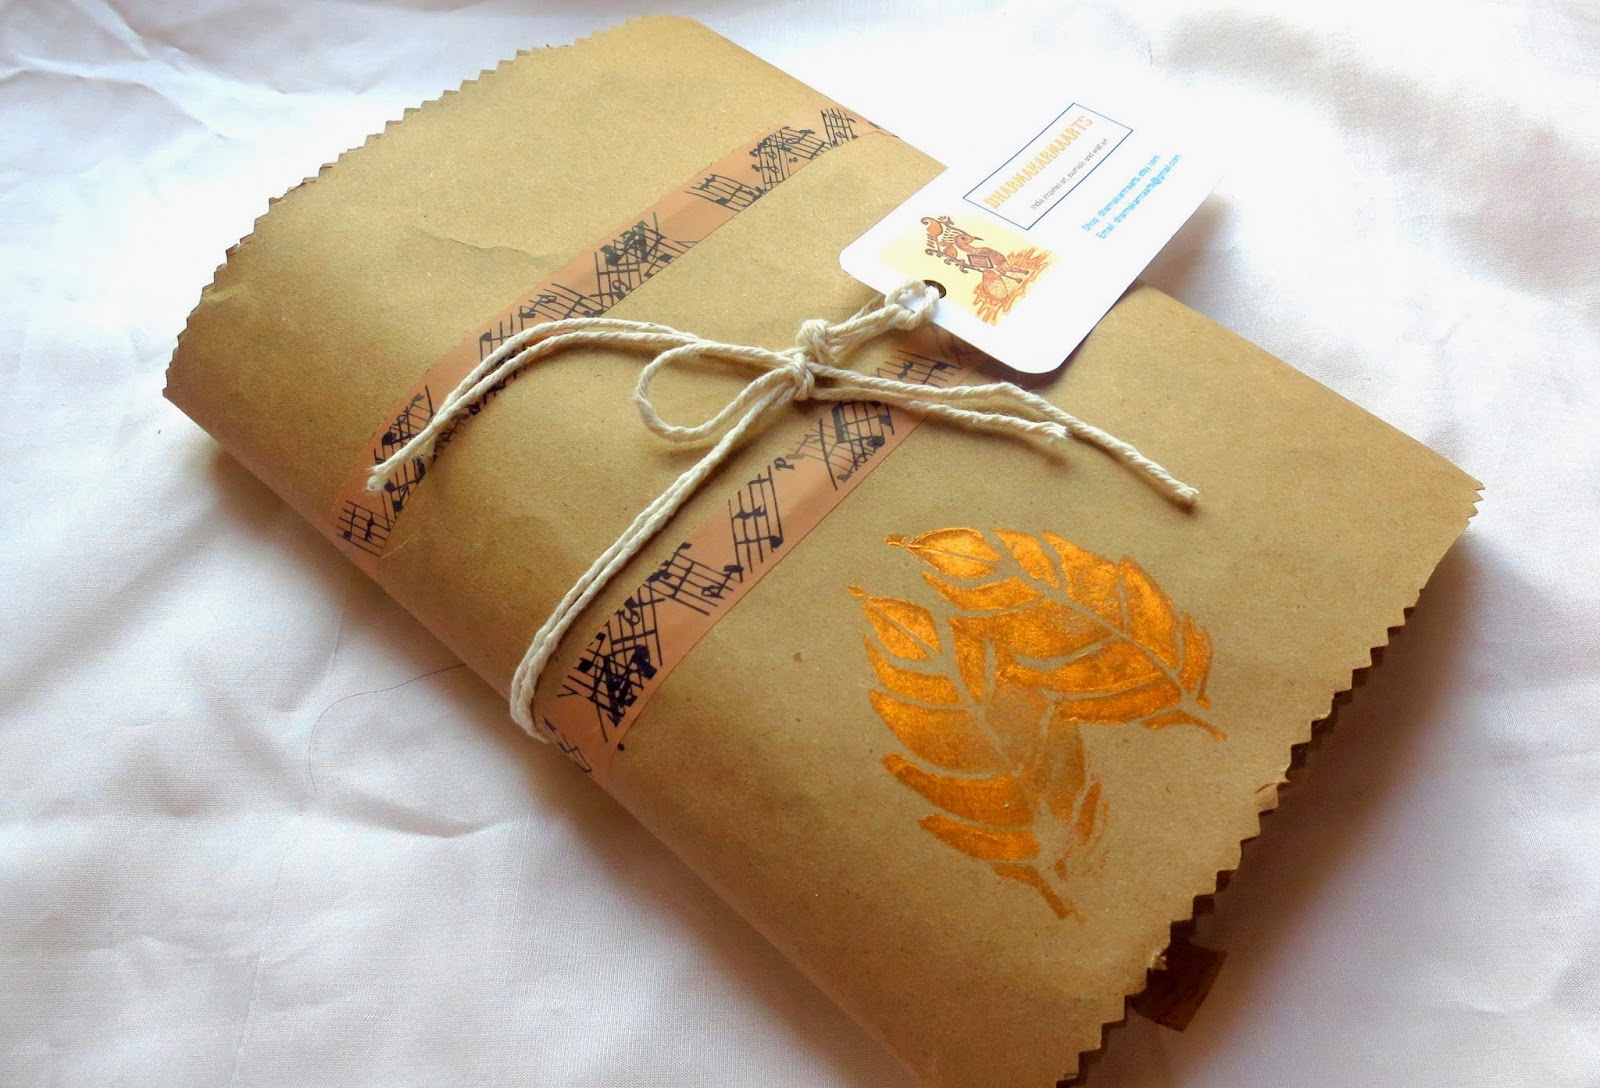
Just a few weeks ago, I decided to give it another try mainly because I wanted to improve product packaging at my shop with some special wrapping and stamping. Surprisingly, I made better progress this time around. As the old adage goes, practice does make perfect. I started with a basic leaf shapes, then progressed to letter OM, a few birds and an elephant. Not all of them came out right at the first attempt, of course. I do feel encouraged. Along the way, I learnt a few things about materials and attitude:

1.  Use blocks of different size, texture and thickness. Simple erasers like Staedler's, though small, are a good base to work with for small and simple designs. They cost very little and if the stamp turns into a dud, you can put it to its original use as an eraser.

Of the several lines of carving blocks available, Mastercarve is the best in terms of thickness, texture and ease of use. It is so thick that sometimes I feel that one can carve on both sides. However, it is the most expensive and currently not available anywhere. The lotus, OM and the elephant above were made with mastercarve.


Speedball Speedy Carve is currently the best available in the market and it comes is variety of sizes and prices. It has a nice solid surface which allows for carving small and intricate designs. However, it is not very thick which means that large stamps will be wobbly to hold and may have to be mounted on a wood block. The birds on a cup above was made with this material

Speedball Speedy Cut is a poorer cousin of Speedy Carve. It is of poorer quality with a crumbly texture. One should not attempt anything that is delicate or details. That does not mean it is totally useless. It is okay for simple shapes like leaves and is good for experimenting since it is very cheap. The big leaf in the photo above was made with this block.


2. Be patient. There will be many moments when one is tempted to dip into an inkpad to test the image. Resist them. Similarly, know when to say when and resist the temptation to keep slicing every inch of excess rubber. Avoid it. Come to think of it, stamp carving almost has a meditative feel to it; embrace that feeling.

Thanks for visiting.


Monday, December 23, 2013

Trip to Venice (Virtual)!


It has been a while since I participated in the Virtual Paintout challenges but this month's topic lured me back. For the month of December 2013, we have been asked to travel to Venice to partake in the beauty of its canals, gondolas, the bridges and the colorful architecture of its buildings. Many artists have captured this place on their canvas and this is my take on Riva degli Schiavoni.  (Watercolor on Arches Rough, 8.5" by 11").

Thanks for visiting.


Sunday, December 15, 2013

Published in Cloth Paper Scissors PAGES


It is always a thrill when one is given a chance to share one's technique with others in the community. Thanks Cloth Paper Scissors. All the images used in the transfers come from the Graphics Fairy, a wonderful site that contains thousands of free vintage images.

Thanks for visiting. 

Sunday, December 1, 2013

A Glimpse into My Sudio and My Work

Getting Material Ready For An Order


Tools of Trade


Nice view of the backyard
Embroidered Cover for the Journal

 Inside Cover With an Envelop (Hides the Stitches)


Finished Journal
Wrapped and Stamped with Handmade Leaf Stamp and Ready to Ship
A weekend in the studio always soothes my heart and soul.

Thanks for visiting.

Wednesday, November 27, 2013

Mail Art: Snail Mail in the Age of Electronic Mail


This was my first attempt at mail art. I was first introduced to this fascinating art form on Dave Dube' artblog and later on I came upon upon this book "Good Mail Day: A Primer for Making Eye-Popping Postal Art" by Hinchcliff, J and Gilligan, Carolee. And there are several boards on the Pinterest to inspire.

Not surprisingly, I used my favorite characters, Elephant Lochanadevi and her child, for my first mail art. In this age of texting and e-mail, it is touching to see this pair still using the old-fashioned snail mail.

I am pleased that it got published in the July 2015 issue of UPPERCASE which is dedicated to Stamps and Doilies. It is quite fantastically put together and you can get a low-resolution view of it in here.


Thanks for visiting. Your comments are always appreciated.

Sunday, November 17, 2013

Image Transfer on Wood


A while ago, after reading Collage Fusion: Vibrant Wood and Fabric Art Using Telamadera Techniques by Alma de la Melena Cox, I got myself a pyrographic kit from Michaels. I have yet to create art using her techniques, but I learned how to transfer images using the wood burning tool. It has become one of my favorite image transfer techniques. I like using it on small unfinished wood surfaces and the more I use the more I like it. This weekend, I decorated a set of wood tags using this technique and while I was at it, I took photos and wrote up this tutorial.

 Materials Needed

1. Wood burning kit. Available at all craft stores. Buy one that includes a circular tool point.
2. Small unfinished wood pieces--tag, round and rectangle shaped. They can be found in the wood craft section at Michaels. Transfer works best on unfinished and unpainted pieces. 
3. Craft acrylic paints, glazing medium and gel pens. Again, these can be bought from any craft store.
4. Copyright free images. An excellent source for free images are www.thegraphicsfairy.com. The images should be printed on a laser printer or photocopied. The images used for transfer should be toner based. Inkjet prints will not transfer. The photo below shows a sample of wood pieces and images.


Instructions

The kit I bought came with several points along with the burning tool and one of them was a transfer point. It is a round disc (see below). 

1. I taped the image on the wood surface (image side down). I taped the image so that my left hand would not be in the way of the burner tool.


3. I set the temperature dial on the wood burner to the maximum and let it heat for about 6 minutes.

4. Once it was heated, I rubbed the point over the image using a continuous circular motion.


5. It took about five minutes to get the image transferred. When it was done , it looked like this.


As you can see, the transfer causes some burning to occur. I, personally, do not mind this, If you want to minimize wood burns, you can use set the heat at a lower temperature. Experiment a little to see what works for you.

Tip 1: Press firmly but not too hard and move the tip continuously in a circular motion. Otherwise, the paper will get round burn marks which will imprint on the wood.
Tip 2: Lift the paper often to make sure the image is transferring.
Tip 3: The tip can get very hot; use caution and follow the manufacturer's instruction on safe use.

The following steps are optional. You may stop with just the image transfer and use the pieces in their natural, unfinished state or you may additional colors and enhancements.

6. Squeeze a few drops of craft paint on a paper plate. Add several drops of glazing medium to the paint and blend it thoroughly. Craft acrylic paints are usually opaque and adding a glazing medium makes the paint transparent. Paint over the image. When done, it will look like this.


As you can see, the image is visible under the paint. You can stop here and use the tag as it is or if you want to do more, you can highlight the details with gel pens. Black and white colors work best.


Thanks for visiting.

Saturday, November 16, 2013

A Bug's Life


This week's challenge at I am the Diva czt is to tangle a tile around a bug. I decided to tangle and place my bug on that most natural of tiles, a leaf. Early in the fall season, I had collected several leaves. I had coated them with mod-podge and packed them in a ziploc bag. This kept them from drying out and also made the surface smooth for drawing. I used a calligraphy pen and acrylic ink to draw the fine line/vein of the leaf. I drew the dragonfly with white gel pen.

Thank you for stopping by.

Friday, November 8, 2013

Leaf Art in Autumn


The leaves are falling with abandon covering the ground in riotous colors. As I feel their soft skin, they seem to be calling out "Take me with you. I am not ready to be raked away or sucked up". How can I resist? So, I bring some home with no idea of what I was going to do. I put them in a large ziploc bag so that they would not dry up while I decided how to immortalize them. The large maple leaves turning into this mouthwatering chocolate color were perfect canvases to doodle and to cut designs. So, every night I worked on one leaf without any prior planning, simply letting the leaves speak to me. The technique is very simple, tools are minimal and in short time one can produce a work of art.


For doodling on the leaves, I used a white gel pen. These are non-permanent and if you make a mistake or don't like the design, you can wash it off and start all over again. You can also apply a thin coat modge-podge over the doodle to seal it. To keep it from drying out, put in a ziploc bag. It will stay soft and supple for quite a while.


For cut out, I used a basic exacto knife. I lightly drew the lines first with a while gel pend and cut around the lines. Again, I sealed the leaf with modge-podge after the basic design has been cut.


Thanks for visiting.

Saturday, November 2, 2013

I am the Diva Zentangle Challenge: Comfort/Danger Zone


The Challenge at I am the Diva this week is to find one's comfort zone and then move to danger zone. My comfort zone is creating ZIA. The danger for me is using an unusual material to create the ZIA with a single pattern used repetitively. At some point though, both zones became one and the same.

I used a maple leaf that had fallen on the ground and turning into this beautiful brown color with a hint of gold here and there. I used a white gel pen to draw the tangle.

Thanks for visiting.

Streets of Chennai: Sunday Morning at Barnaby Road, Kilpauk


Familiar Sight: Intersection of Truck and Motorcycle !


Offering Prayers from Outside: Padala Amman Temple


Vehicles Parked Outside the Temple


These photos were taken on a Sunday morning around 9 0' clock when the traffic was still light. It is still awesome to see how pedestrians, four-legged creatures, two-wheelers, auto rickshaws and trucks navigate their way on this busy intersection. There are really no traffic lights or pedestrian crossings here. Just everything and everyone following their own internal GPS!

Thanks for visiting.


Friday, October 18, 2013

Challenge #140: Monotangle Pointillism


This week's challenge at I am the Diva czt is to create a monotangle with tiny dots. I did not exactly do a tile. But, I love using dots in my art. It is actually very calming to do. The one above is my signature sari art done with Indian silk, watercolor and of course, dots.

The one below is more elaborate  with lots of dots, bindis and swarovski crystals.


Thanks for visiting.

Wednesday, September 11, 2013

Attracting Backyard Birds

Yellow Finch Munching Coneflower Seedpod

Ever since I found out that coneflower seedpods attract finches I stopped deadheading them. Now every fall yellow finches visit my yard to feast on these pods. The pictures are not sharp because I took these pictures from inside the living room through the glass window. Otherwise, the finches would have flown away at the slightest disturbance.


Thanks for visiting.