Showing posts with label food. Show all posts

Saturday, May 22, 2021

How to Make Ghee


Though Ghee is typically referred to as clarified butter, the process of making ghee differs from that of clarified butter. For ghee, the butter is simmered till the milk solids settle in the bottom and the butter is completely caramelized. Ghee has a nutty flavor and is very aromatic.

Ghee is used in Indian cooking in variety of ways. It is the fat of choice in all Indian sweets. In addition, ghee is mixed into rice and dal; spread on roti and used for tempering rasam.

Making ghee is easy but does requires care and attention. One can use either salted or unsalted butter. Except that the milk solid residue from salted butter will be very salty and must be kept in consideration if the residue is used in any other preparation. For example, I  reuse the pan with the left over residue for making vegetables and if it is residue from salted butter, I will use less salt for the vegetables.


How to make ghee:

Place the butter in a heavy pan, and melt it over low simmer flame. As the butter melts, it will foam a little bit. As it continues to heat, the foam will clear up and butter will turn into clear pale yellow liquid. If you stop here, you will get clarified butter. However, if you want ghee, continue to heat the butter till the liquid turns brown. Turn off the heat and let the liquid cool. Once it is cooled, pour into a container. It will keep well for a month or more at room temperature. No need to refrigerate.


Thanks for visiting.

Friday, May 23, 2014

Coconut Rice


Rice is the staple diet of South Indians and the South Indian cuisine is replete with mouth-watering variety of rice dishes, ranging from gravies and sauces that can be mixed into plain cooked rice to one-pot dishes like pongal, coconut rice, lemon rice, tamarind rice, curd rice, sesame seed rice, to mention just a few. The Tamil festivals of Pongal and Aadi Perukku are celebrations of the versatility of this grain and the rich cuisine it has spawned.

Among the several one pot rice dishes, coconut rice and lemon rice are the easiest and foolproof dishes to make. The ingredients for the two dishes are also commonly available now-a-days. Interestingly, after years of bad press coconut is also making a comeback as a good for you natural food. I make coconut rice often. I made it today and as I was making it I decided to take photos of the preparation and post it here. Below is the recipe for coconut rice.

What you will need: (see 2nd photo above)
(based on your taste and preferences, you can add more or less of the ingredients below)

long grain rice, 1 cup
grated coconut, fresh or dried, 2 tablespoons
coconut oil (can be substituted with any other oil) 1 tablespoon
salt to taste
black mustard seeds, a pinch (optional)
urad dal, 1/2 teaspoon (optional) 
chana dal, 1/2 teaspoon (optional)
one red chile (optional)
cashew or peanuts (optional)
asafoetida, a pinch (optional); asofoetida promotes digestion

1. Rinse the rice in cold water several times to remove as much starch as possible. The cooked rice has to be loose and fluffy to get the right texture for a tasty coconut rice. Cook the rice according to instructions. However, if the instructions call for 1:2 ratio of rice to water, reduce the amount of water to 1 1/2.

2. Transfer the cooked rice onto a baking dish and let it completely cool.

3. Meanwhile, heat oil in a skillet. If you are not planning to use any of the optional ingredients, simply roast the coconut in the oil till it turns golden brown. Add the roasted coconut to the rice. Add the desired amount of salt.

4. Blend the rice, salt and coconut with a spatula. You are done!

5. If you want to add any or all of the optional ingredients, this is the order in which you would proceed:

(All the roasting should be done in low heat)
a. Heat oil in a skillet and add the asafoetida
b. Add the mustard and let it pop
c. Add urad and chana dal and roast them till they turn gold brown
d. Add and roast the nuts till they turn golden
e. Add the chile
f. Add the coconut flakes and roast till they turn gold brown
(for reference, see the third photo)
g. Follow steps 3 and 4 above to finish the dish.


Thanks for visiting.


Saturday, April 26, 2014

Eggless Indian Tapioca Pudding


The beauty of this tapioca pudding is that it is egg-less and it does not need baking. It is cooked right on stove top with just three ingredients: tapioca, milk and sugar. Just like that it tastes good but often it is further embellished with cashews, saffron and cardamom.

What you will need:

Tapioca, also called sago
Milk
Sugar
Cardamom pods (optional)
Saffron (optional)
Cashews (optional)
(I am not giving precise measurements for the three main ingredients. Two tablespoons of tapioca for a cup of milk will give you a fairly thick pudding. If you want yours thin, use less tapioca or more milk. Same goes for sugar.)

1. Soak the tapioca in cold water for about 30 minutes. Soaking helps it cook faster.


2. Slowly heat the milk in a thick vessel on the stove. When the milk is quite hot, add the tapioca (without the water) into the milk. 
3. Cook the tapioca in the milk in low heat. Stir the milk and tapioca frequently to prevent it from sticking to the bottom of the container.
4. As the tapioca cooks, it will lose its whiteness and turn translucent. When it is completely translucent, add sugar and other condiments, such as saffron and cardamom.


5. Remove from heat.
6. If you want, you may add cashews either raw or roasted.


Serve hot or cold. Enjoy.


 Thanks for visiting.


Friday, April 4, 2014

Peanut Butter and Green Pepper: Is it a Dip or a Curry?


Curry Sandwich


Whenever we have an international luncheon at work, I always struggle to come up with a dish that will appeal amidst all that meaty splendor spread on the buffet table. It was when I noticed Scott, my son-in-law, eating it with relish, that it occurred to me that I should make it for this year's international luncheon. Sure enough, every one liked it, wanted the recipe and here it is.

This is a variation on a Goan curry that is made with homemade ground peanut and coconut paste. One day, feeling lazy, I decided to substitute  peanut butter. I have not looked back since then :)

Ingredients

medium sized green, red bell peppers (capsicum)-- 2 or 3
medium sized red onion-- one (optional)
fresh ginger to taste (optional)
Chunky peanut butter--1-2 tablespoon
Olive oil-- 1-2 tablespoon
salt to taste
red chili powder (optional)
turmeric-- 1/2 teaspoon (optional)


Instructions 


1. After removing the core and the seeds chop the pepper into small chunks. (Cut the onion and the ginger also into small pieces, if you are using them.)


2. Heat olive oil in a skillet; add the onions and the ginger. (Note: I have also added black mustard seeds. That is the way I cook but you do not have to.)

3. Cook till the onions turn translucent.


4. Add the chopped bell peppers, spices and the salt.


5. Cook till the peppers turn soft.


6. Add peanut butter.


7. Mix it thoroughly into the cooked vegetables with a spatula till it is all melted and gooey.


You can eat this with nacho chips, pita bread, naan or roti. Any which way, it is finger lickin' good!


Sunday, March 23, 2014

Fenugreek Leaf Flatbread


The recipe given below uses fenugreek as the stuffing. it can be substituted with mint or coriander. Vegetables such as potato or radish can also be incorporated.


1. Thoroughly wash the fenugreek leaves to remove all mud and dirt. Then chop finely.


2. Heat oil in a skillet and sautee till the leaves are cooked. At this point, it will shrink considerably in volume.


3. Transfer the cooked leaves into a bowl. Add desired amount of wheat flour and a pinch of salt.


4. Add water into the mix and knead into a fairly stiff dough.


5. Split the dough into small balls.


6. With a rolling pin, roll the ball into a thin round shape roti.


7. Heat a griddle on top of the stove and lay the roti on the hot griddle. Drizzle ghee or coconut oil around the edge of the roti. Cook on the griddle till each side turns brown and crispy. Remove from heat and serve with yogurt.


Thanks for visiting.

Saturday, February 1, 2014

Quick and Tasty Sweet Potato Curry


Though sweet potatoes is one of my very favorite vegetables, I prepare it only one way--as a stir-fry curry. It is a quick preparation but can be made tasty with several  flavorful ingredients.

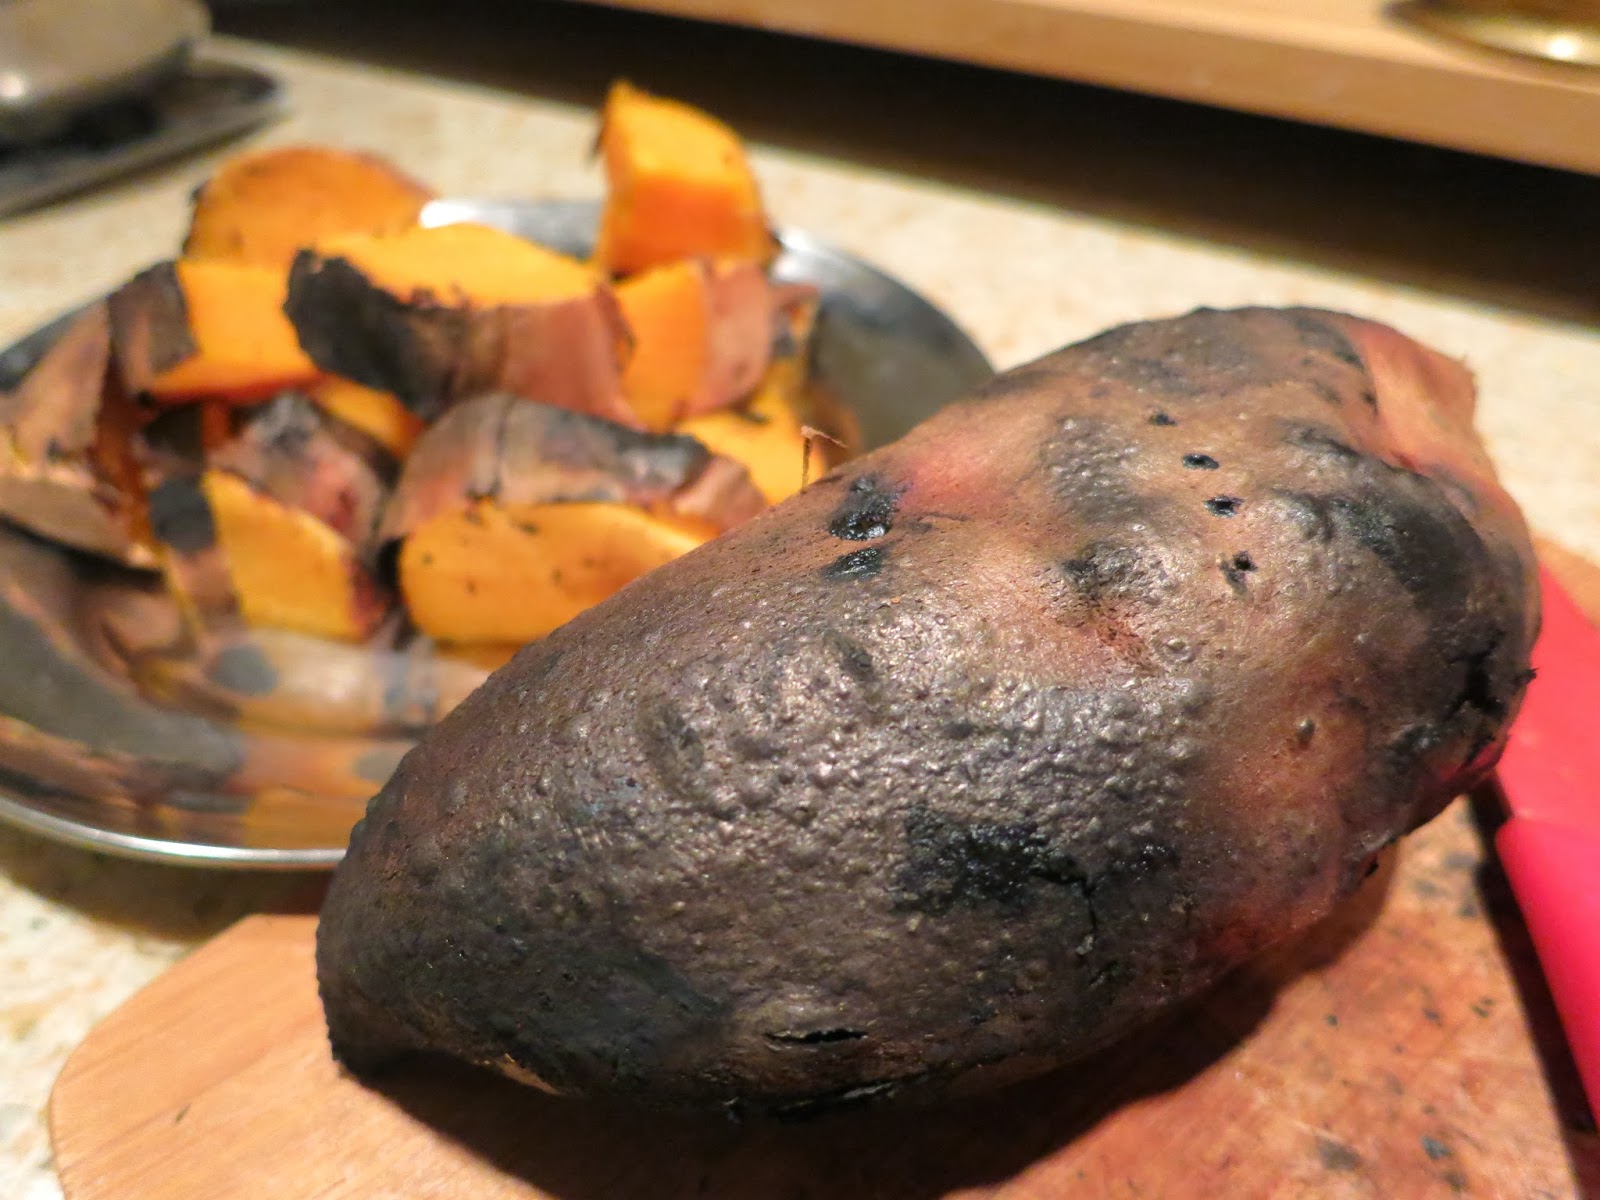
I heat it on stove top first (wrapped in aluminum foil) till it is just softened. I chop it into chunks without removing the charred skin.


For stir frying, I use walnut oil. I read somewhere that walnut oil is better than olive oil to use with sweet potatoes. (You can also use coconut oil.) To counter the sweetness, I add one or two red dried chilies. 


I finish it off with grated coconut and roasted curry leaves. 


Instructions

Ingredients

Medium sized sweet potatoes: 2
Walnut oil: 1 tablespoon
Olive oil: 1/2 teaspoon
Urad dal: 1 teaspoon ( urad dal is a hard legume and adds a nice crunchy contrast to the softness of sweet potatoes)
Dried red chillies: one or two
Salt to taste
Turmeric: 1/2 teaspoon
Dried grated coconut: I tablespoon
Curry leaves: 1 sprig
Aluminum foil

1. Wrap sweet potato in aluminum foil and cook it over low heat on stove top for about five minutes. (Cooking it longer will make it mushy. We do not want that!)
2. Remove from heat and let it cool for a few minutes. Take it out of the foil and cut into medium size chunks.
3. Heat oil in a pan and add urad dal. Lightly stir till it turns light brown. Break chilies into half and add to the urad dal. The heat of the oil will turn the chillies into deep red.
4. Add sweet potato chunks into the pan.  Add salt and turmeric.
5. Stir the vegetable with a spatula to blend in the oil, salt and turmeric.
6. Add grated coconut and blend it into the mix with the spatula.
7. Remove from heat and transfer into a serving bowl.
8. Heat olive oil in the same pan and roast the curry leaves quickly for a second or two. Remove from heat and top it over the sweet potatoes.

This curry goes well with Indian flat bread (roti) or rice.

Thanks for visiting.


Sunday, June 9, 2013

Tips and Tricks for a Perfect Homemade Yogurt


Yogurt is the third rail of south Indian cooking (rice and spices are the other two). No meal can be complete without yogurt or yogurt rice at the end. My husband and I have yogurt every day at least once. Although my husband like store bought yogurt, I find it too sour and unnaturally thick. As often as time permits, I make yogurt at home. 

Mind you, making yogurt is both a science and art. A well made yogurt should be solid and sweet tasting with just hint of tang. Room temperature of around 110°F ± 5°F for 7-8 hours is essential for the fermentation process that converts the inoculated milk into yogurt. Making yogurt is an unfussy task in tropical places like Chennai where even night time temperatures for most of the year hover around 90 degrees. However in colder climates like the New England, there is a lot of cosseting and coddling involved in getting the yogurt to form. The method I use has been very successful in producing consistently thick and sweet tasting yogurt. I must confess, I came upon this method by remembering how my mother used to make delicious yogurt in Delhi's freezing winters.


Ingredients

a. Fresh milk, 1 quart (whole, 2% or 1%)
b. 3 tablespoons of yogurt with active cultures as starter (plain regular or low-fat; if you are doing this for the first time, you can buy a small plain yogurt from the grocery store)
c. an incubator

Instructions

1. Heating: Boil the milk in a stainless steel sauce pan. Here the operative word is boil, not "heat". As you can see in photo 1, the milk is boiled to the brim. This boiling causes the milk proteins to denature and solidify. 
2. Cooling: Let it cool for five minutes. Test the temperature of the milk with your little finger. It should feel hot but not scalding. 
3. Inoculating: Stir in the the yogurt into the milk and gently mix it in. Cover the sauce pan with a lid.
4. Incubating: The purpose of the incubator is to keep the milk warm for several hours while the fermentation is taking place. There are many ways to incubate the milk (check the internet) . Mine is pretty simple. I have a stainless steel box, a fairy deep one, which I use for storing  rice/wheat flour. This  is my incubator. I put the sauce pan containing the milk into this container (flour and all), cover it and let it sit undisturbed for 7-8 hours. 
5. At the end of 7-8 hours, you will have your fresh, thick and sweet yogurt. Works every time!


Note: The thickness of the yogurt is totally dependent on the fat content of the milk. Whole milk produces the thickest yogurt. No matter what the fat content, all home made yogurts taste fresh and sweet.

Thanks for visiting.